
The brisée dough is a classic dough used both for sweet and savory tarts and pies!
ingredients for about 440 g of dough (total cost about 3 € for the whole preparation with organic ingredients)
- 250 g di farina 00
- 125 grammi di burro
- 62,5 g water (or milk)
- 4 g salt
This is not the basic dough that I use to make tarts. Normally, I make the basic sucrée (sweet short crust) dough (see QUI about it), but for some sweets the brisée dough, as it is called in French (it literally means “broken” dough) is a better choice, basically because it is not sweet (or not very sweet). It is mostly preferable for flan pâtissiers, upside down tarts, like the famous Tarte Tatin, as well as apple tarts filled with flan batters.
Brisée is a brittle, tender, flaky and relatively elastic dough. It is not sweet at all, or very slightly sweet. Actually, we can use the unsweetened version both for savory and sweet preparations (a tarte tatin), as it’ s little amount of salt, intensifies the sweetness of the garnish. What is more, thanks to it´s low or zero amount of sugar, it is not sticky, therefore it is easy to manipulate, when being rolled out.
The standard ratio for this dough is 4 parts flour, 2 parts butter and 1 part water or milk. If we want to make it a little sweet, then we add up to 10% of the flour in sugar. We also use 4 g of salt for each 250 g of flour. If we prefer, we can substitute butter with a mixture of 50% butter (50%) – 40% sunflower oil + 10% water (since oil consists of about 4 parts fat and 1 part water).
To make this dough we use the sanding method, which means that we have to rub the butter with the flour, rather than just blend them together, until we obtain a mixture that resembles wet sand. This way the butter coats and insulates the flour, inhibiting the formation of glutens, when water is added. Therefore, water should only be added after the flour and butter are thoroughly sanded together. Keep in mind that, since preparing the dough involves rubbing the butter, all the ingredients should be kept cold, otherwise the butter will melt during the procedure and sanding will be poor. If sanding is made properly, then the fat will remain distinct in the crust, making it flaky.
First stage: Forming the dough
The dough can be either formed either by hand or with the use of a food processor. It is strongly advisable though to use the food processor, if available, because when rubbing the butter between our hands, we run the risk to warm it too much and thus to melt it, which will consequently lead to a failure.
Here I will explain both ways so you can do what is more convenient for you. Just remember that whatever you choose, always begin by chilling well all the ingredients (butter, flour, water).
To make the dough using a food processor, we place the flour and butter, cut in small dice into the machine’s bowl and we run it to medium speed or in pulses, just until mixture resembles coarse crumbs. We continue by adding the liquid (with the salt and sugar – if using – diluted in it) and we beat at medium speed for a few seconds, just until the liquid is absorbed by the flour and the dough comes together. If we use half butter, half sunflower oil, first we sand the butter, and then we add the sunflower oil (cold, of course) little by little. We always finish with the water.
If we prefer to make the dough by hand, here’s what we have to do. On the working surface or in a large mixing bowl we sift the flour together with the sugar (if using) and we make a well in the middle. We add the butter, cut in cubes and very cold -always, inside the well. We rub the butter with the flour mixture between our fingers and then our palms, without pressing hard, just in order to get the characteristic texture of wet sand. If we use half butter, half sunflower oil, first we sand the butter, and then we add the sunflower oil (cold, of course) little by little.
We make again a well in the center of the crumbs and we pour in the water, in which we should have diluted the salt. We blend gently and rapidly with one hand, aiming to gradually incorporate the water into the flour-butter crumbs. Then, we quickly gather the dough into a mass. If there are any un-massed remains, we sprinkle a few drops – literally – of water and we add them to the main body of the dough.
Second stage: Fraisage
When the dough is formed, with either one of the above methods, we proceed to the second stage, which in French is called “fraisage”. This stage is mandatory in order to verify the homogeneity of the dough and to “dissolve” eventual pieces of butter that may have remained insoluble. This way we ensure an even and thorough blending of the flour and the butter.
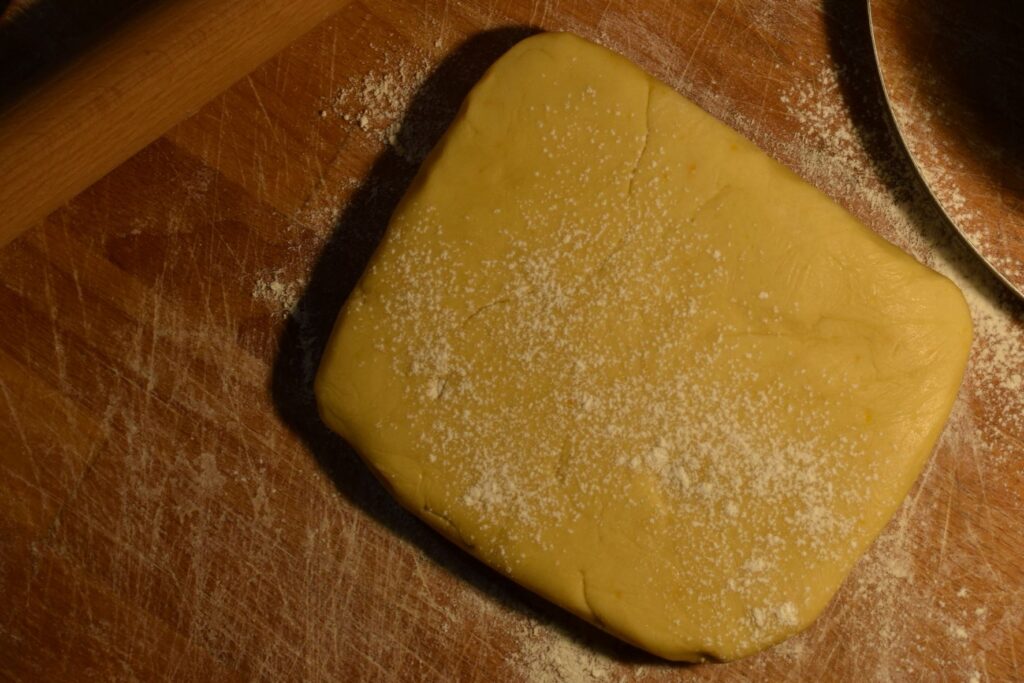
So, we transfer the dough onto a floured working surface and with lightly floured hands we rapidly smear the dough with the heel of our hand against the working surface twice. We gather the dough and we form a ball, we wrap it in clingfilm, then we press it lightly and we let it rest for at least 2 hours in the fridge in order to chill and settle. – ideally until the next day.
Raw dough may be stored in the fridge for 3-4 days, or it can be freezed for up to a month. If you choose to freeze it, you should remove it from the freezer the day before using it, and you should let it soften in the fridge, during the night.